Tuesday, September 6, 2011

Let’s Learn about Ponds

This last week we began our study of ponds.  We used an old school overhead transparency from our science curriculum to get our schema activated and observed all the things that live near a pond. 

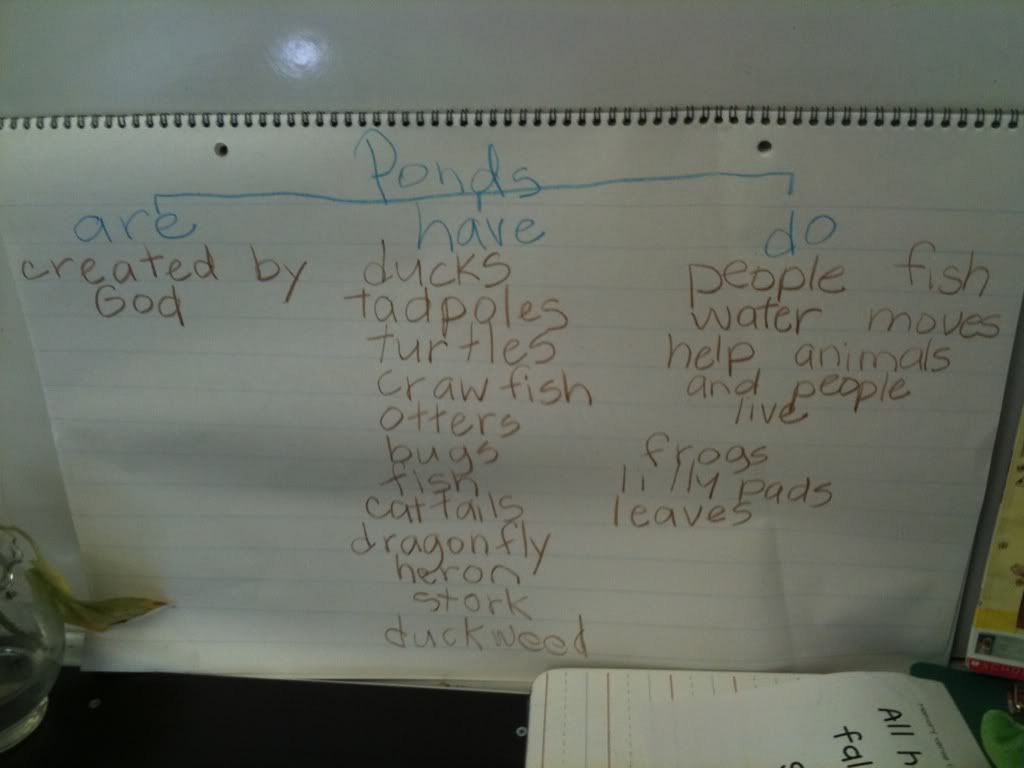
Next we used a tree diagram to brainstorm what ponds are have and do.

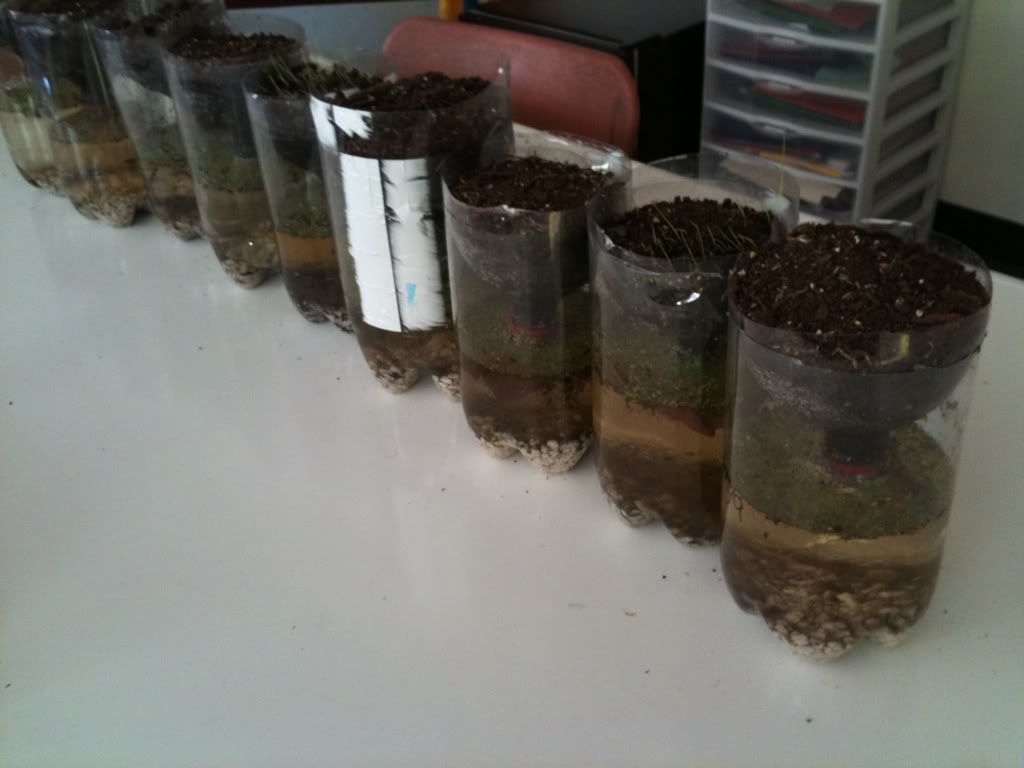
We spent a lot of time last week working on creating our own bottle habitats.  I found a great resource online a few years back that I’ve used ever since as a springboard.  I can’t find the resource now that I printed off then, but here’s another that might be helpful.  This one is put out by the Annenberg Foundation.

We found it very interesting that we added to our pond in a similar order that God created His world.  First we added land and water; dirt in the top part, rock then water in the bottom.  Our next step was to add grass seed and duck week (the plants).  Next will be fish.  These steps were spread out through the week with a few observations that we made as scientists to learn how adding things to our habitats change the habitat.

My first graders this year did a great job showing detail on some of their observations this year.  I’ll add those to this post later. 

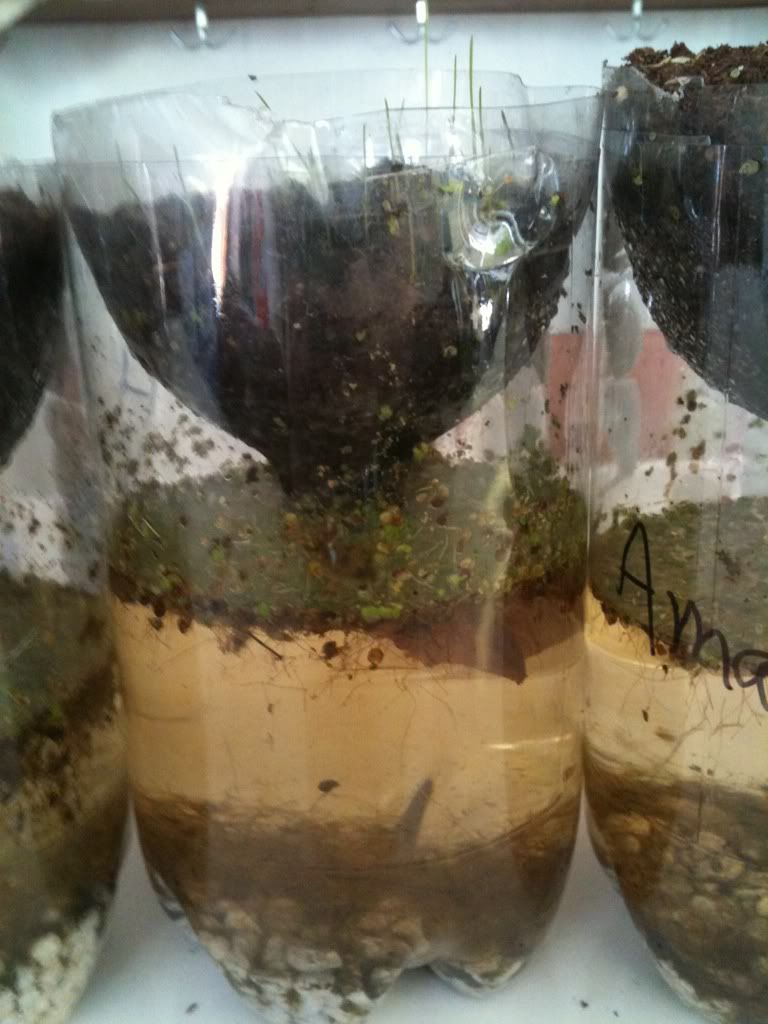
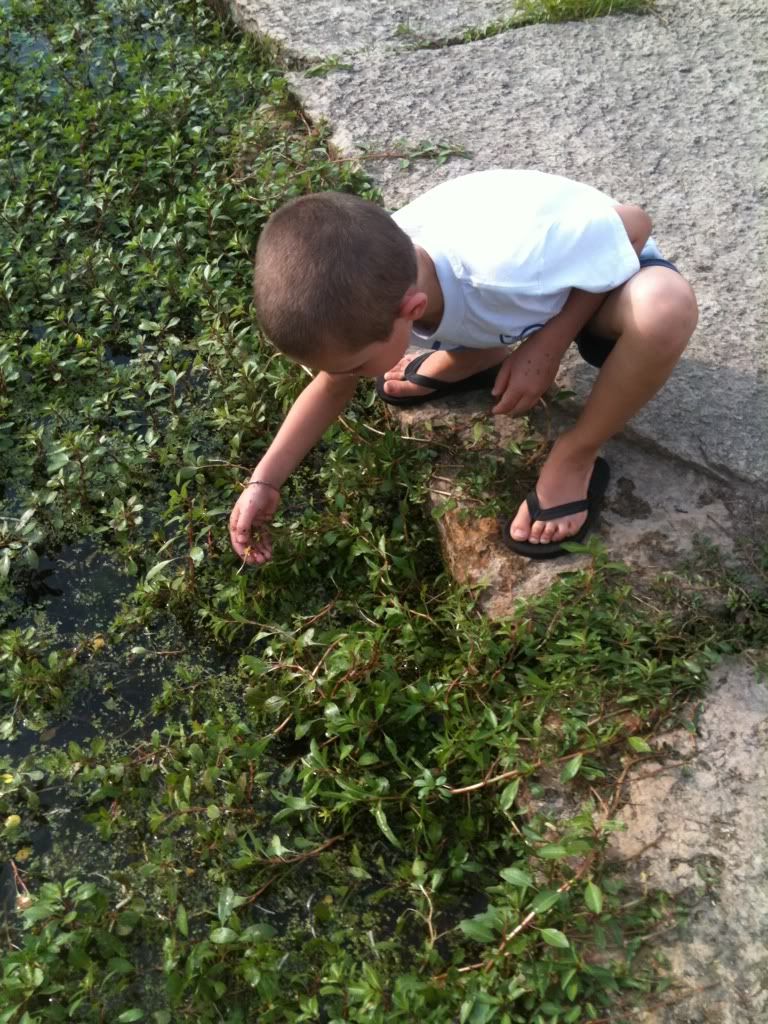
A couple of nights before adding the grass seed and duck weed to our habitats I took one of my students with me to the park after school to collect duck weed from the stream.  (The benefits of teaching in a close community)  He really enjoyed this special time together and we had duck weed to add during our next science lesson.

f90fa0b0.jpg

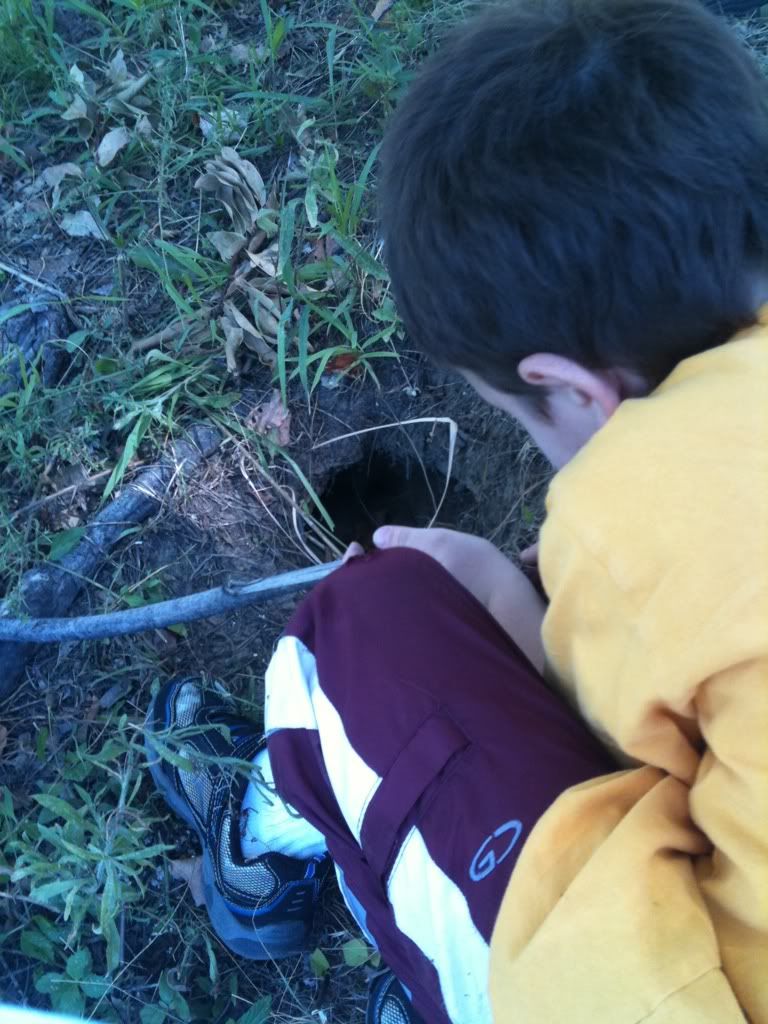
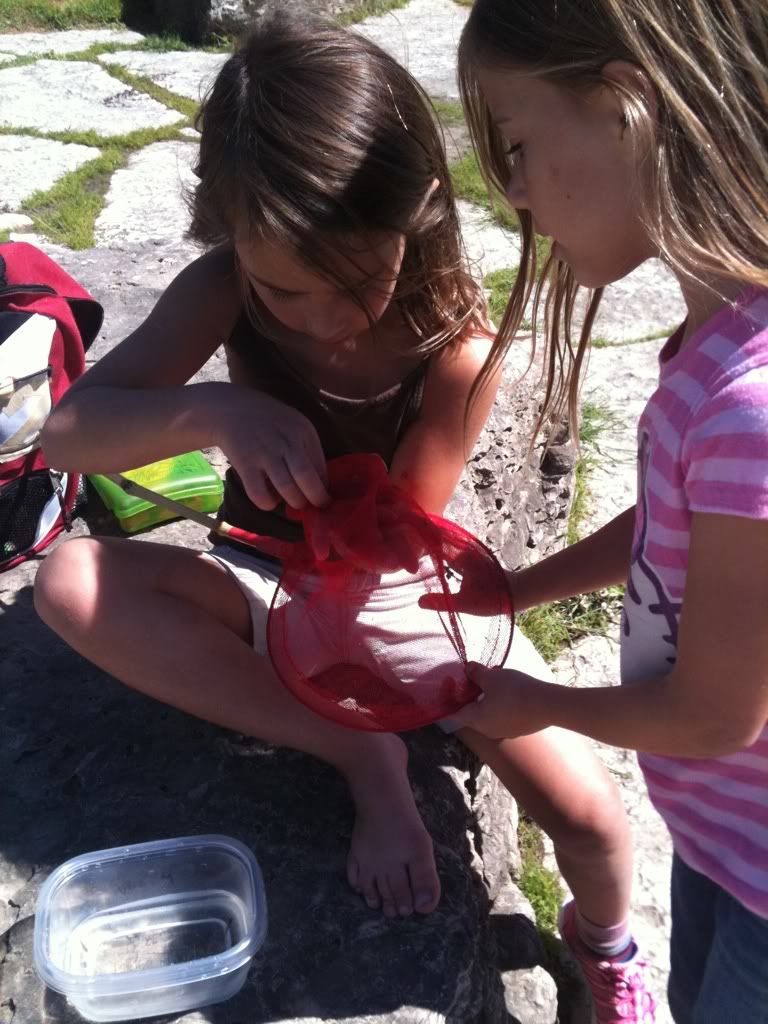
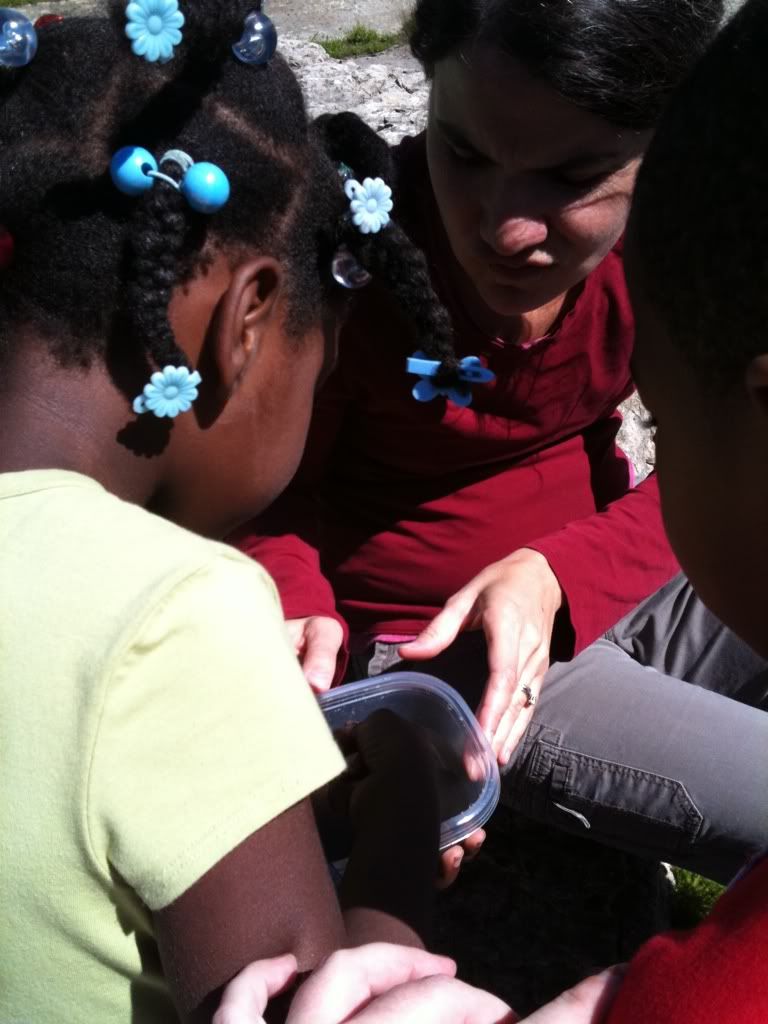
Today we all went on our field trip to the park.  It was a whole lot of fun!  Students spent time exploring, catching bugs, and finding natural treasures around them.  We refocused on our tree diagram (that we brought with us) and commented on things we had previously brainstormed that we could now say definitely live near ponds as well as added more living things we spotted.  We spotted some turtles, water bugs, a cardinal, a duck, dragonflies, a grasshopper, and lots of other little insects.  We even spotted this habitat below.  Anyone have any ideas of what might have created this little burrow?  We were maybe thinking a muskrat.

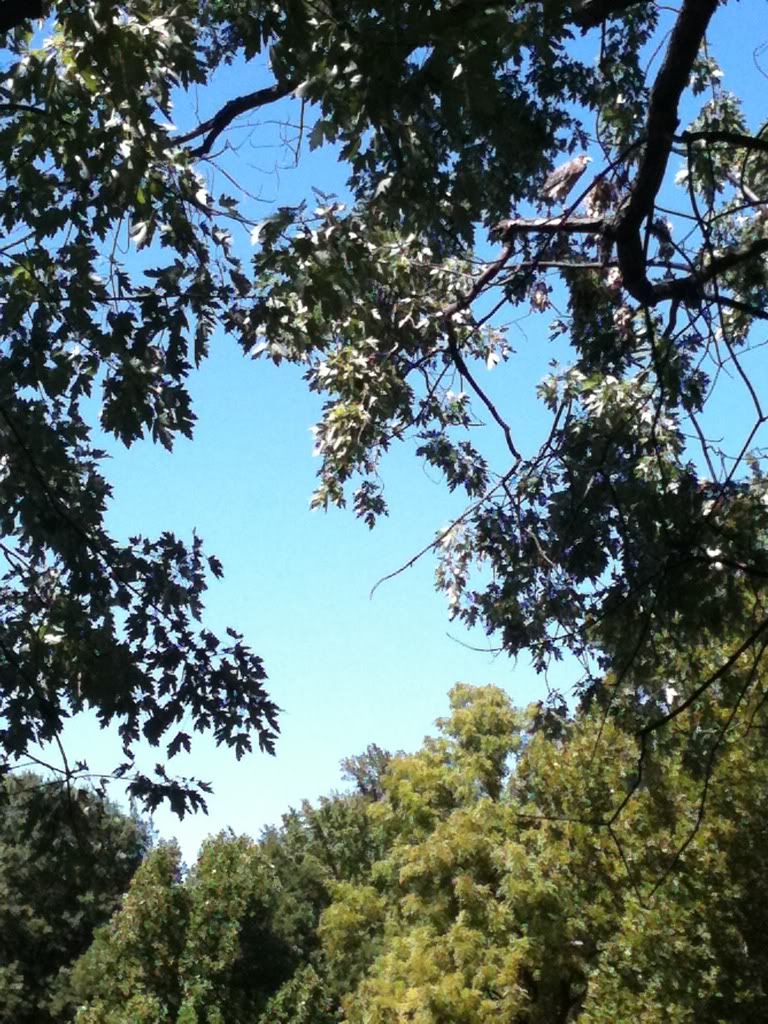
We even spotted a heron up in the tree!  Can you find it?  we talked about how the heron lives close to the pond because it likes to eat fish.

After a little exploration time we focused in on specific areas inside hula hoops to see if we could find smaller creatures living near the pond.  Students found little beetles, roly polies, crickets, little green insects, and all kinds of plants. 

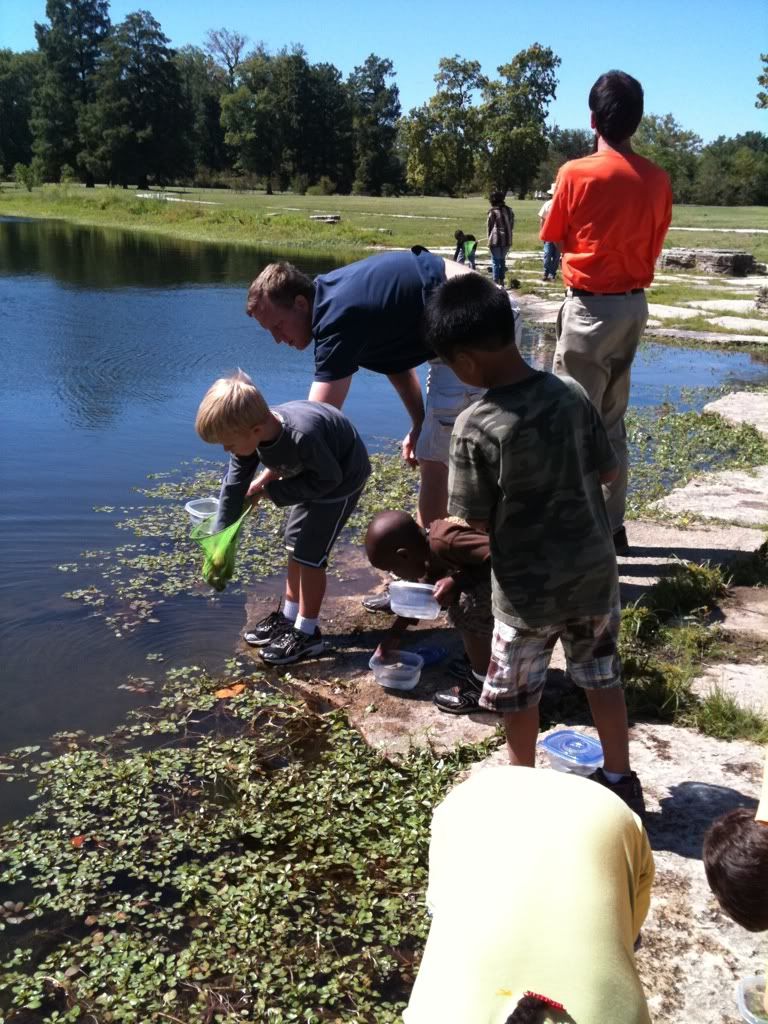
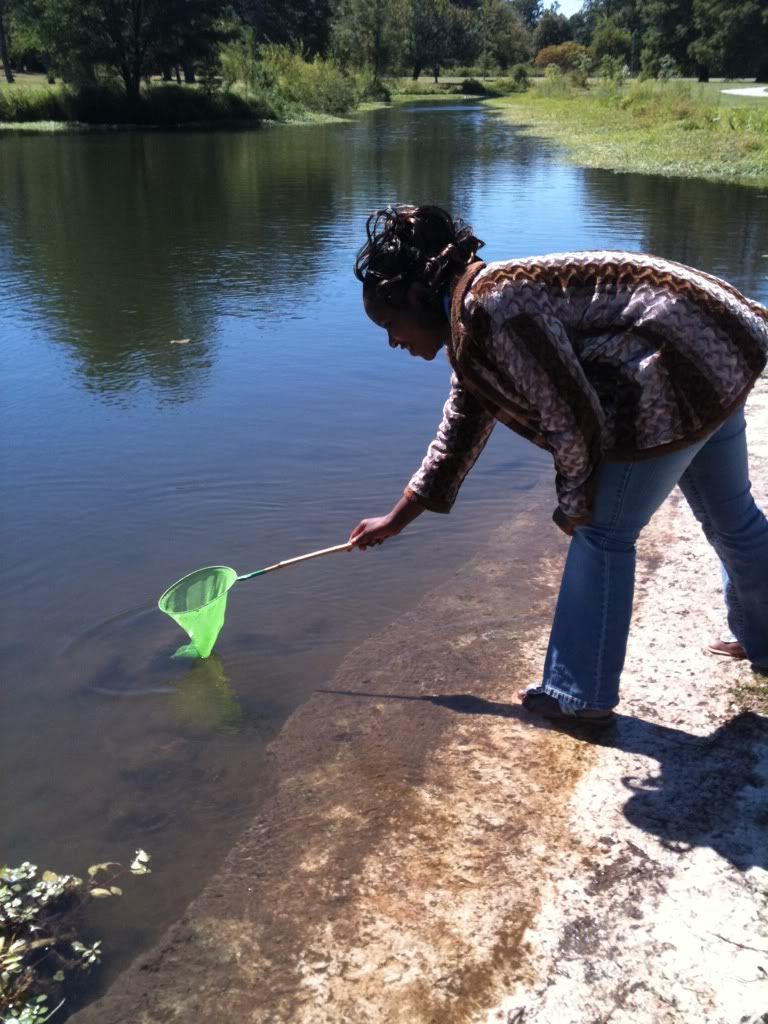
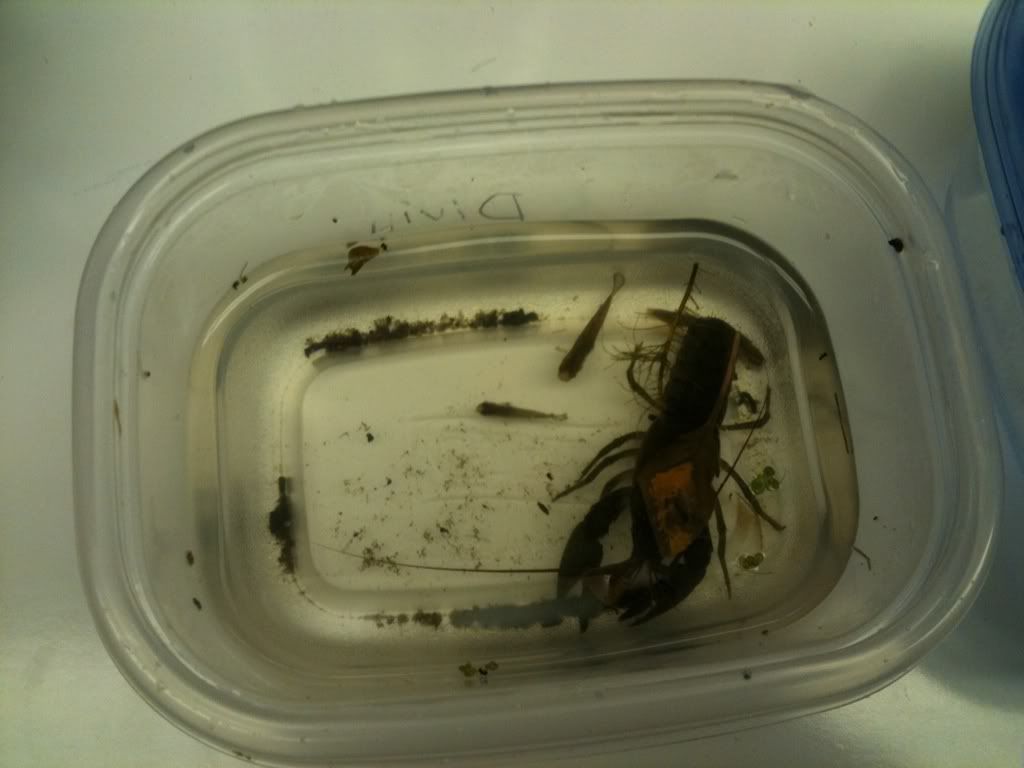
We then got back in our vehicles and drove a little ways down the street to a stream that runs through the park.  Here we caught all kinds of minnows to add to our bottle habitats.  One student even caught a crawdad!  This was a first.  In the three years I’ve taken my kids on this field trip I have never before seen one.  So we of course had to bring it back to school for further observation.  I’ve got to do some research tonight though – find out what it eats so we can care for it during observation.  Then I suppose I’ll have to choose another student to go with me back to the park to release it late this week or early next week.


8e193942.jpg

2d98a765.jpg

252181e1.jpg

We have our fish all ready to add to our bottles tomorrow morning.  I’m sure we’ll have to do it almost right away because we won’t be able to focus on anything else until that work is done.

252181e1.jpg

Tuesday, August 16, 2011

Two Days Down

I’m exhausted and ready to fall asleep … and yes it is only 7:30.  I can’t even imagine all of you with 20 + kids.  I've only got 12.  But those 12 are as diverse as night is from day.  I have 4 countries represented this year in my classroom: Burma, Burundi, Congo, and the United States. 

image

I am really thankful for the opportunity we have at the school I teach at to do God’s work in loving the immigrant and refugee and to pursue reconciliation between many different people groups.  But it’s incredibly complex.  My student from Congo just arrived in the country 3 short weeks ago.  And he’s not content to sit still and listen to words he doesn’t understand.  We spent a great deal of time today as a class working on the words wait and be still.  I’ve begun building stamina with my kiddos for Daily 5 on read to self.  But what do you do to help someone “fresh off the boat” (or plane) when you’re trying to watch everyone else to make sure they’re following procedures and you don’t need to regroup to check in.  I’m not even sure today if my students read the whole time as I was trying to introduce my non English speaker to a tool he can use during read to self to increase his vocabulary, which I figure is the best place to start considering he knows three or four English words in all.

I spent time today teaching my kids how to communicate using body language and short phrases in order for them also to help our new friend rather than the shoving and snatching that began happening with the lack of communication between them.  I have a feeling this is going to be a lesson in patience for a few of them. 

Three years ago I worked with two ELL students new to the country who did not yet speak English but at the time I taught kindergarten.  The students were of a culture that was extremely soft spoken and respectful of authority so it worked out well as they would sit and listen to become accustomed to hearing the English language.  It also worked out very nicely because the skills they needed to learn Kindergarten also needed to learn.  This year will be a little different story.  I’m so glad I teach using Daily 5 and a workshop Daily 5ish approach to math!  This is going to open up much more opportunity for me to meet the needs of my students using differentiated instruction.  I’ve just got to figure out how to teach the procedures and build stamina while having one who has not a clue what I’m communicating.

I’m sure I’ll have much to share with you this year as I learn how to meet the needs of a student new to the country while also meeting the needs of the rest of a diverse group.  If any of you have ideas that might be helpful please leave a comment.

Thursday, August 11, 2011

I've Been Working on My Classroom ...

Think ... I've been working on the Railroad. I'm not sure why that was in my mind with that tune but now I can't seem to get it out of my head. I've been Working on My Classroom all the live long day. I've been working on my classroom just to pass the time away.
Can I just say I'm loving my classroom this year? Both the group of kids I'll be having and the way I'm setting up and designing my classroom.
Here's a little tour ...

Photobucket

This is what you see when you first enter the room. It's where we're keeping everything important like the turn in tray, pencils, and hand sanitizer. On the bottom shelf I'm keeping the kids portfolios. I keep important assessments like the IRI and other pieces of evidence that show students have mastered standards.

Photobucket

Around the corner is our class library. These are mostly my fiction books. It looks like I may have squished this picture a little much but you get the idea. We call this area of our room the pond. It is one of two meeting areas this year in our classroom. I have gone to less table spots than students in order to both open up the room and provide for several different areas in which students can work. This will work in my classroom because I have short whole group lessons and then break out into independent workstations during both literacy and math. During that time I meet with smaller groups of students for more diferentiated instruction.
The next picture will show my nonfiction section of my classroom library. This section is just at the opposite side of the pond from these shelves.

Photobucket


There are actually two shelves here back to back. This shelf is my nonfiction library. The shelf to the back of it houses my chapter books. The small shelf on the side has all animal fiction stories. Aren't there a lot of those? I thought it would be easiest to separate them like this rather than place them in three or four baskets. I'm using the treasure box on top of the shelf this year for Bible time. I will be introducing Bible to the kids this year using the parable of the pearl of great price to share with the kids the treasure of scripture and of relationship with God. I'll then use it to spark curiosity of what the next lesson will be each week. This year I also installed small white boards on my closet doors. These are going to be used for my word wall. Instead of taping up index cards each week, I'll write up the words with dry erase. Much easier so I'll be much more likely to stay on top of it.


Photobucket

This is my writing area. I keep materials for my kids to use both on the white bookshelf to the left as well as in little cubbies on top of the trapezoid table. I'm using a small Fancy Nancy bulletin boardish thing I found on Pinterest on the side of the bookcase. You can link back to the original poster here. My idea is to use Fancy Nancy words when I teach my students to revise their writing. We'll talk about which words are ones that we use too much when we're writing and I'll put those on library pockets on the Fancy Nancy board. We'll put words on popsicle sticks that are fancy words or synonyms for those words in the pockets. I will teach my students to highlight words that are used often and replace them with words from the fancy word pockets.

Photobucket

This is where I'll be meeting with my small groups. I know it's still a mess. I've got two more days to finish up. Hopefully I can make it. It's not in this picture but where the watering can is I now have a small closet shelf where I've put all of our clean up supplies. The job chart will go next to it on the end of the wall that sticks out there. You can see into the second side of my classroom where I have two "tables". One of them is a table and the other is two desks zip tied together and covered with shower board. I've actually covered the table with shower board now too. My kids last year destroyed the table top and I needed to cover it with something. I thought shower board might be a fun route and with my very small class this year (10 students) we could all fit around it if we wanted to write spelling words or do making word lessons or whatever else.

Photobucket

This is my math and computer area. On the white shelf is my math book library and math notebooks that we will be using for calendar time. I bought these from Cara Caroll at her TpT store. Our math workstations will be in the drawers under the computer table. Behind the green curtain I have extra supplies stored for when we run out throughout the year.

Photobucket


Around the corner from math is area for listen to reading. This is located in our bog. Similar to the pond, the bog is another large group meeting area. There was no room on the walls near the class library in the pond for calendar materials so I used this space for that.


Photobucket


Here is a somewhat finished bog. The trees on the walls are sticker decals that can be easily taken off and reused. (At least that's what the package says.) Most everything on the calendar wall is standard. But the two cookie sheets will be used for data collection. Each day we will have a question and the kids will place a magnet with their name on it on one of the two pans to answer the question. I am adding a section to the Math Notebook I talked about earlier in which students can collect data. They will make tallies for this collecting and then graph the results and analyze the data.


I do not have pictures of my science area nor of a shot of the classroom from the opposite end. I would like to add those at some point. But this post is long enough for now.


I hope you enjoyed a peek at my classroom! :)


Wednesday, August 3, 2011

And the Winner is …

My first give away is over and it is time to announce the first winner. 

image

image

Mrs. D please email me (through my blogger profile) to let me know if you if you would prefer a gift card in the mail or by email.  I need either your snail mail address or email address to send it your way.

Thanks to everyone who participated!  When I reach 100 the give away will be a little bigger and hopefully a little more worth your time.

Sunday, July 31, 2011

Give Away Reminder

Just a reminder … my first give away ends tomorrow.  I didn’t realize I would be out of town so I’ll pick the winner Tuesday evening.  I know a $5 gift card to Target isn’t much but it’s all I can afford.  Leave a comment on my give away post for your chance to win!

We Missed You File

Mrs. Scoma over at First Grade FUNdamentals posted some very cute freebies today, including a We Missed You label for a file folder when kids are missing.  Hers is super cute and would wonderfully for classrooms with a star theme.  I created my own to go with my frog theme.  Here it is if you want it.

image

I plan on making a couple of folders in case I’ve got more than one student gone at a time and have a student place an extra of each thing we do during the day in the file for the student who is missing.

Saturday, July 30, 2011

A Teeny Tiny Teacher Give Away!

Kristen over at A Teeny Tiny Teacher is having a give away!  She has reached over 300 followers and is giving away a $20 dollar gift card to Barnes and Noble.  I don’t know about you all but that could be awfully dangerous for me as not very often can I walk in to Barnes and Noble and spend only $20.  But I do have a lot of books on my wish list and this $20 would be oh so helpful.  If you would like an opportunity to win this give away head on over to A Teeny Tiny Teacher!

Monday, July 25, 2011

Voice Level Chart & Read to Self Book Bags

Not too long ago I started seeing out there in blog world voice level signs. 

I pinned this one on Pinterest.  It comes from http://mrsparkerssecondgrade.blogspot.com/.  I decided though it was close to what I want for my classroom that it would be really cool to use the same scrapbook paper that I had used for my clip chart.  See here.  I think mine turned out really cute.  I just wish I had thought to include pictures before I started.  Most of my kids would be able to read it by the end of the year.  But at the beginning?  Not so much!  Oh well … repetition, repetition, repetition.  We’ll see how it goes without the pictures and then maybe I’ll fix it up again for next year.  But for now it looks oh so cute.

I used the same scrapbook paper as I did before from Hobby Lobby and used spray adhesive to glue them to a poster board.  I then cut out the boxes with words that I created using Microsoft Word.  I glued those as well as the numbered circles in place, laminated, & cut.  And voila!  If you would like a copy of the already made boxes and numbers post a comment and I’ll send them your way.


I’ve also been thinking a lot about how I want to do book boxes for our Read to Self time during Daily 5 this year.  In previous years I’ve used magazine file boxes but this year I repurposed those boxes into containers for my classroom library. 

You can see in this picture that groupings of books that I have a lot are kept in larger bins while groupings of books that I don’t have so much of are kept in magazine file boxes placed on their sides.  This works well to manage lots of groups of books when they don’t take up the space of a whole bin.

Anyhow … all that to say I’m not using the magazine file boxes any longer for book boxes.  They also took up a lot of space in kids’ cubbies.  this year I will be giving my kids book bags to use.  They can hang this on their cubbies along with their backpacks or place the bags up above in their cubbies if they need to.

In order to make this book bag I first found a picture to use.  I bought the picture of the frog from scrappindoodles.  I then copied the picture into the paint program on my computer.  (I don’t have any fancy programs on my computer.)  Using paint I made a mirror image of the little froggy reading and then pasted it back into Word.  I used word Art for the words and used the paint program again to make the mirror image.  I was able to fit 3 of these to a page and then printed them out on Iron on Transfer paper.  After printing these out I just trimmed around the picture and word art and then ironed them on the bags.  Nothing to it.  If anyone has any better ideas on how to reverse image words or pictures please let me know.  I feel like there should be something easier but I just don’t know what it is.

Sunday, July 24, 2011

More Give Aways

What the Teacher Wants is having a fun giveaway.  One of their area teacher stores is giving them a $25 gift card to give away and the great news is you can shop their store online!  To enter hop on over to What the Teacher Wants.

Oh Boy 4th Grade is having a huge give away!  Head on over to enter.

Back To School Bonanza

Erica Bohler along with 11 other great teachers are hosting a HUGE giveaway! With their Back To School Bonanza you have a chance to win 12 products, one from each of their TpT stores. Head on over to enter.


Saturday, July 23, 2011

Are you Pinning?

I love all the ideas I’m seeing out there on Pinterest and so thankful that a bloggy buddy invited me to join.  I have already found so many great ideas and can’t wait to begin creating some of them. 

image

Check out my Pinterest board by clicking below or by using the button to the left. 

pinterest


Michelle at Michelle’s math in the middle is hosting a linky party to share Pinterest boards.  If you would like to find more teacher Pinterest boards full of more great ideas follow the link below.

AreYouPinningSmallButton

Wednesday, July 20, 2011

50 followers … Time for a Give-Away

Yea!  I have 50 followers.  I’m so excited!!!  Can you tell?  I never use exclamation marks so frequently.  Each time someone else decides to follow my blog and the number goes up I get a little excited.  And now that I have 50 I want to celebrate!

I somewhat frequently include free things I’ve created and I don’t have anything for sale in my TpT store so I can’t use those for a giveaway.  How about a $5 gift card to Target.  That will get you 4 items from the dollar spot + tax. 

There are 4 ways to enter (one is worth two entries):

1. Comment that you follow me.

2. Blog about my giveaway on your blog and link the post in your comment.  Worth two entries.  Just copy and paste and comment twice.

3. Grab my blog button (It’s nothing fancy … my first attempt and it was successful – meaning it works)

4. Put me on your blog roll.

I will use this random number generator to pick a winner Monday, August 1.

Testing ... Testing ... 1, 2, 3

Photobucket


Just testing out my new blog button to make sure it works. I've hit 50 followers and I'm trying to get a button together you can grab so I can do a give away to celebrate.


If someone would grab my button and put it for a test run and leave me a comment, I would really appreciate it.


Thanks!

Classroom Management

Miss Kindergarten is having a classroom management linky party.  I was already thinking about posting part of my classroom management system in my classroom.  I just updated and “cutefied” my clothespin chart that I use to chart behavior.  Seems like Abby over at The Inspired Apple had the same idea.  She did it a little differently however.  But you might want to head over there to see what she came up with.

Last year I started the year without a “stop light” chart.  I didn’t want students to constantly be thinking about how other students were doing.  I began by using a credit/debit economy system instead.  I had created a credit/debit book using Adobe Pagemaker.  I no longer have the document since the software I was using was an older version and didn’t work with Windows 7.  I plan on creating a new document before school starts and will share it with you when I’m finished.  Part way into the school year I realized that although I really dislike how students keep track of each other’s behavior, a visual concrete way of tracking behavior was necessary – especially for the kids I had last year.  One of my coworkers introduced me to Clip ChartClip chart takes the traditional stop light chart and expands it to help promote positive behavior. 

1I quickly made a chart last year to begin implementing Clip Chart right away.  However I realized as soon as I began laminating that my chart was a little crooked.  I wasn’t going to spend the time fixing it then as I desperately needed to put the Clip Chart in place for my kiddos behavior and for my sanity so I left it as it was.  I added numbers on the side to track credits/debits at the end of the school day.

I have thankfully found a little bit of time this summer as well as a whole lot of inspiration from my fellow bloggers to make this chart a little more presentable.  I found some gBack To Basics Paper Stackreat scrapbooking paper at Hobby Lobby that worked perfectly.  I just picked out a page of each color and then glued them together.  The blue, pink, purple, yellow, orange, and red are each 6 inches tall and then the green is the full 8 inches.  It might be a little long but it will have plenty of room for those clothespins.  Last year I ran out of space – especially on the green. 

3

I then went into word and created text boxes for each part of the chart.  I created the text boxes for the numbers separately and added those afterwards.  Then all I had to do was laminate, cut, and punch holes on the top to hang the chart.  I went to Home Depot last year and bought pegboard and had it cut to the size of my bookshelves so that I could have backs to my bookshelves and double it as hanging space.  This pegboard is perfect for hanging my clip chart with the way that I arranged my classroom this year.  I’m not sure where my students will move their clips if they get off the chart this year.  Last year I had the chart hanging with string in my doorway and when they were off the chart they moved their clip on to the string and if they moved higher than that their clip was moved to the internet wire that is nearby.  When someone was “on the wire” this was really good news.  Anytime students moved off the chart I hot-glued a small sequin to their clip.  They loved this of course.  If you would like a copy of the text boxes click below.

image

Saturday, July 16, 2011

Many many giveaways to be had ...

There are so many give aways out there right now. Oceans of First Grade Fun has reached 1,000 followers and to celebrate is giving away 10 of her TpT items from her store. Head over there for a chance to win.

Ladybug Teacher Files has also reached 1000 followers. To celebrate she is giving away 4 blog templates from her Ladybug Teacher Resources blog. Head over to Kristen's blog for a chance to win.


I've been seeing First Grade Owls around but hadn't yet hopped over to read any of her posts. Just became a follower though and look forward to read all of her ideas. First Grade Owls has just reached 100 followers and is celebrating by having a giveaway for one item from Mrs. Will's kindergarten TpT store as well as a gift card for $25 at Target. Hop on over to enter to win.


Wednesday, July 13, 2011

Data Saver Linky Party

data saver


Laura Starnes over at Kinder Kraziness is having a linky party to share ideas on how we all back up or store our data. I’ve enjoyed checking out how others organize their files and thought I might have something to add to this conversation. Organization is a bit of a gift of mine.


Last year for Christmas my parents gave me a 1 TB portable hard drive. It has SO MUCH Space!!!! I love it!


WD Elements SE Portable WDBABV0010BBK - hard drive - 1 TB - Hi-Speed USB


This portable hard drive marketed by WD Elements is fairly reasonably priced. Not only do I have my school files stored on this device but there’s also room for all of my music and photographs. I have many, many files downloaded onto this little drive and I don’t think I’ll ever run out of space. There’s just no way!


image


I split the hard drive into 4 or 5 different categories: First Grade Files, Photos, Music, Spirit Week, and Kindergarten Files from when I used to teach Kindergarten. The First Grade files is then split up into subcategories. (See below.)


image


Each of these folders is split up even further. I always keep my portable hard drive with my laptop and transport my laptop between home and school. When creating or downloading materials from other fabulous teachers I save them in the file that makes most sense and that I will most easily find it again. Have questions about my subcategories … Just leave it in a comment.


Hope this helps someone!


To see how other teachers are organizing and backing up their files follow the link below ...


http://www.kinderkraziness.blogspot.com< /a>

Friday, July 8, 2011

Grade Level Link Up

Head on over to The Teacher's Lane for a great way to link up with other teachers at your grade level.


Wednesday, July 6, 2011

Taberski workshop on comprehension

I've been home for about an hour from a workshop with Sharon Taberski. I had time to grab a bite to eat and put together a new shelf for my home and before I get too tired I want to spend a bit of time blogging to share some of what I learned.
Sharon said she was tired, though I certainly couldn't tell from the way she presented. She is an absolutely phenomenal teacher. So ... what did I learn?

* Background Knowledge needs to be of much more importance in our classrooms than it is currently.
* Reading strategies should be taught as courses for action to accomplish a specific objective. We need to remember to have students practice strategies in purposeful contexts not for the strategy itself, but as a way to get to an end of comprehension.
* We should think of comprehension as a complex process involving interactions between readers and texts.
* Our classroom libraries and read alouds should include 50% fiction and 50% nonfiction.
* Content area literacy centers help students to build background knowledge.
* We can teach kids to intentionally build background knowledge themselves. It is not just about us providing scaffolding.
* Use elaborative language to more fully explain how things work to children.
* Students should have both good fit books and look at books in their book boxes. Look at books are nonfiction books in which students can increase their background knowledge by looking at pictures or reading text features.
* We can teach students to use nonfiction books that are above their good fit levels in order to research. We should teach students a strategy called stop, look, & learn. They look through a book and stop when they see something that is either interesting or that has a sentence that they are able to read. Next the student should look more closely at the picture or sentence. Lastly, they should recognize what they have learned and gained in knowledge.
*Students need to have the opportunity to write what they know and talk about what they know. People know they know what they know when they have the opportunity to share it.
* As teachers we often ask too many unimportant questions. The questions we ask must lead the learner to really think about his or her thinking.


Here are some resources Sharon Taberski recommended:


As if I didn't already have enough to read and think about ...